Obsidian Plugin
Quaily provides an Obsidian plugin that allows you to use Quaily's publishing, unpublishing, and sending newsletters or blog posts within Obsidian.
Combined with Obsidian's powerful Markdown editing capabilities, Quaily's Obsidian plugin can help you better manage your posts.
About this plugin's usage, please refer to "📝 Write with Favorite Editor and Publish to Quaily".
Installing the Plugin
Quaily's Obsidian plugin can be found in the Obsidian community plugin list. You can install it directly from there.
- Open Obsidian's settings page and click on the "Community Plugins" tab.
- Click the "Browse" button at the right of the "Community Plugins" tab. A plugin list will appear.
- Search for "Quaily" in the plugin list and click the "Install" button.
You may need to restart Obsidian again for the plugin to take effect.
Please refer to the plugin homepage for manual installation instructions.
Configuring the Plugin
After installing the plugin, you need to configure it to use the functionality provided by the plugin.
- First, open Obsidian's settings page and click on the "Community Plugins" tab. Find the Quaily plugin and click the "Settings" button.
- Log in to Quaily and complete the authorization process. (You can also use
Quail: Logincommand in the command palette) - Choose a list from the dropdown list.
Restart Obsidian for the plugin to take effect.
Writing Posts
You can write posts in Obsidian as usual. Once you have finished writing an post, you can use Quaily's Obsidian plugin to publish it.
Before publishing, you need to generate summaries for your posts according to Quaily's requirements.
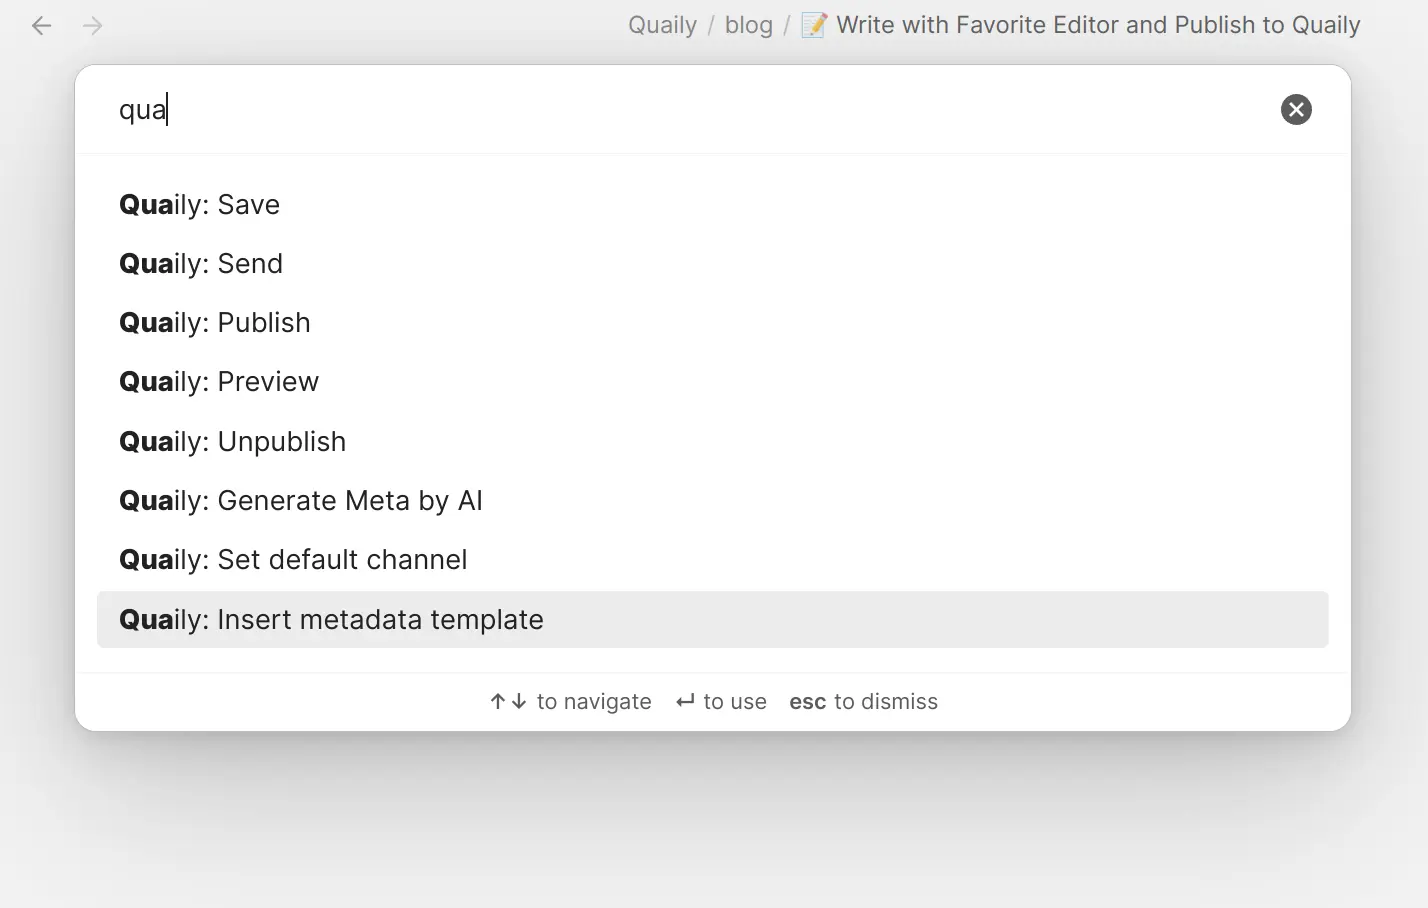
Here are some useful commands provided by the plugin, you can use them in Obsidian's command palette.

Generating Summaries and Metadata
Quaily provides the functionality to generate post summaries using AI. You can use Quaily's Obsidian plugin to invoke this feature. Here's how:
- Press the shortcut key
Ctrl + Pto open Obsidian's command palette (orCmd + Pfor macOS users). - Type "Quaily" and select the "Quaily: Generate Meta by AI" command, then press Enter.
- Wait a moment, and Quaily will automatically generate the summary, tags, and other metadata for your post. It will insert them at the beginning of the post in frontmatter format.
You will see something similar to the following at the beginning of your post:
---
slug: "post-slug"
datetime: 2021-08-01T00:00:00+08:00
summary: "post summary"
tags: "tag1, tag2"
cover_image_url: "URL of post cover image"
---
In the above frontmatter:
slugis the slug of the post, which Quaily uses to generate the post's URL. This slug should be unique within the entire list and generally consists of English words representing the post's title. You can manually modify this slug if you don't want to use the generated one.datetimeis the publication date of the post.summaryis the summary of the post.tagsare the post's tags.cover_image_urlis the URL of the post's cover image, which you can manually modify. However, when modifying it, please note that:- The cover image must be publicly accessible, or
- The cover image must be an image from your Obsidian and use an absolute path. Please refer to the "Inserting Images" section below.
TIP
You can also choose to manually enter the summary instead of using the AI-generated one.
If you don't want to use the AI-generated summary, you can select the "Quaily: Insert Metadata Template" command, and Obsidian will automatically insert a metadata template for you to manually enter the information.
Saving posts
- Use command "Quaily: Save", then press Enter.
- Wait a moment, and Quaily will automatically save the post to Quaily.
If you log in to Quaily at this point, you will be able to see the post you just saved in the "post List".
Publishing posts
- Use command "Quaily: Publish", then press Enter.
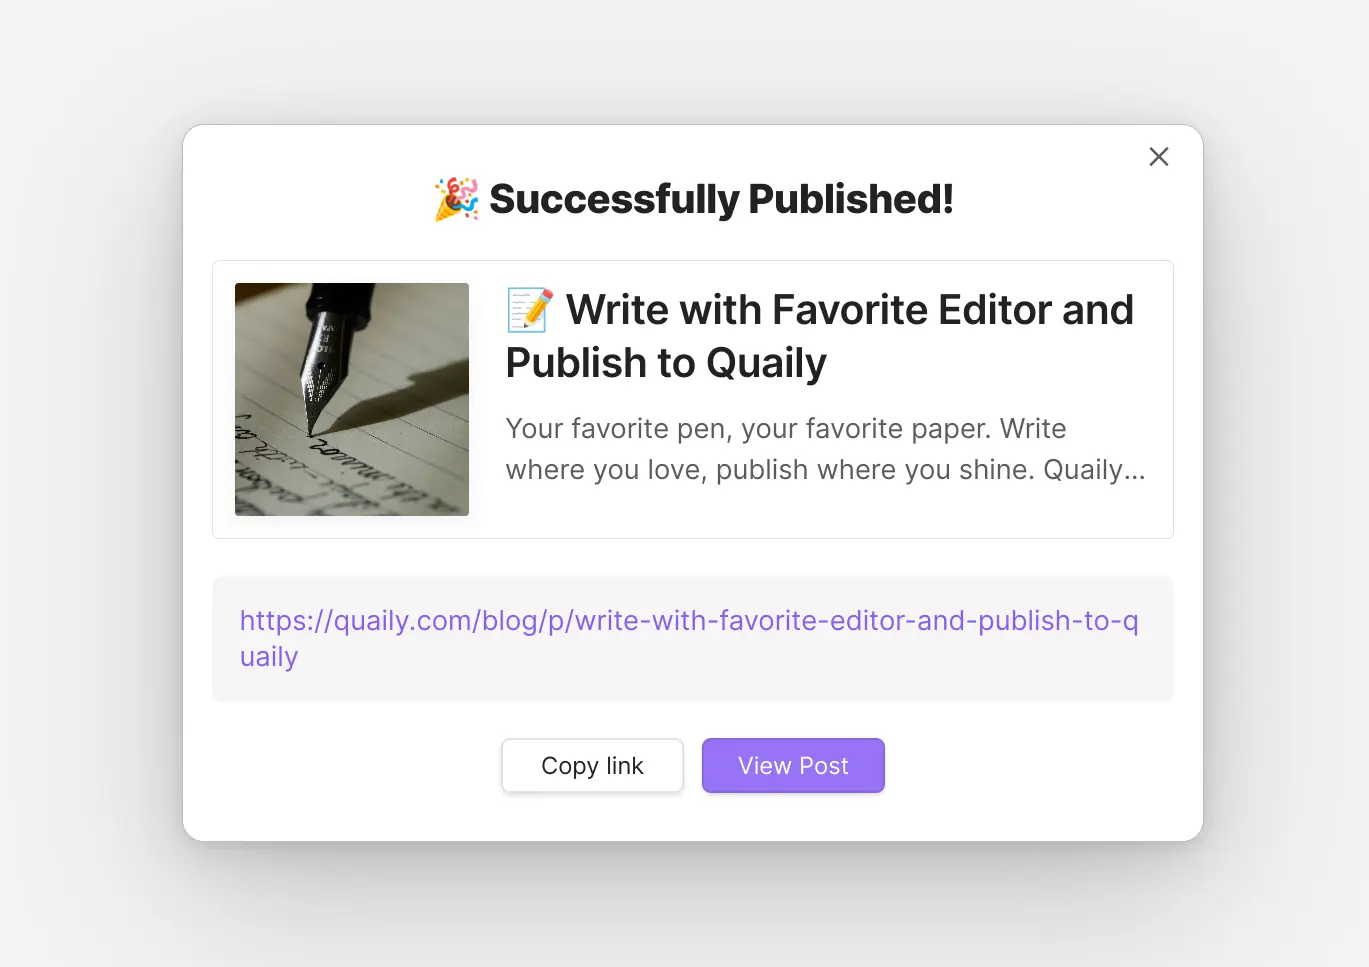
- Wait a moment, and Quaily will automatically publish the post to Quaily and display the post's access URL. It's status will be changed to "Published" from "Draft", making it visible to others.
- Quaily will popup a dialog for the publish result, you can click on the displayed URL to view your post, or click on the "Copy" button to copy the URL to your clipboard.

Unpublishing posts
- Use command "Quaily: Unpublish", then press Enter.
- Wait a moment, and Quaily will automatically unpublish the post. It's status will be changed to "Draft", making it no longer visible to others.
Sending posts
- Use command "Quaily: Send", then press Enter.
- Wait a moment, and Quaily will automatically send the post to your subscribers via email.
- If you have connected your Quaily account with Telegram, Discord, or LINE, Quaily will also send the post to your connected channels.
Previewing posts
You can preview your post before publishing it.
- Use command "Quaily: Preview", then press Enter.
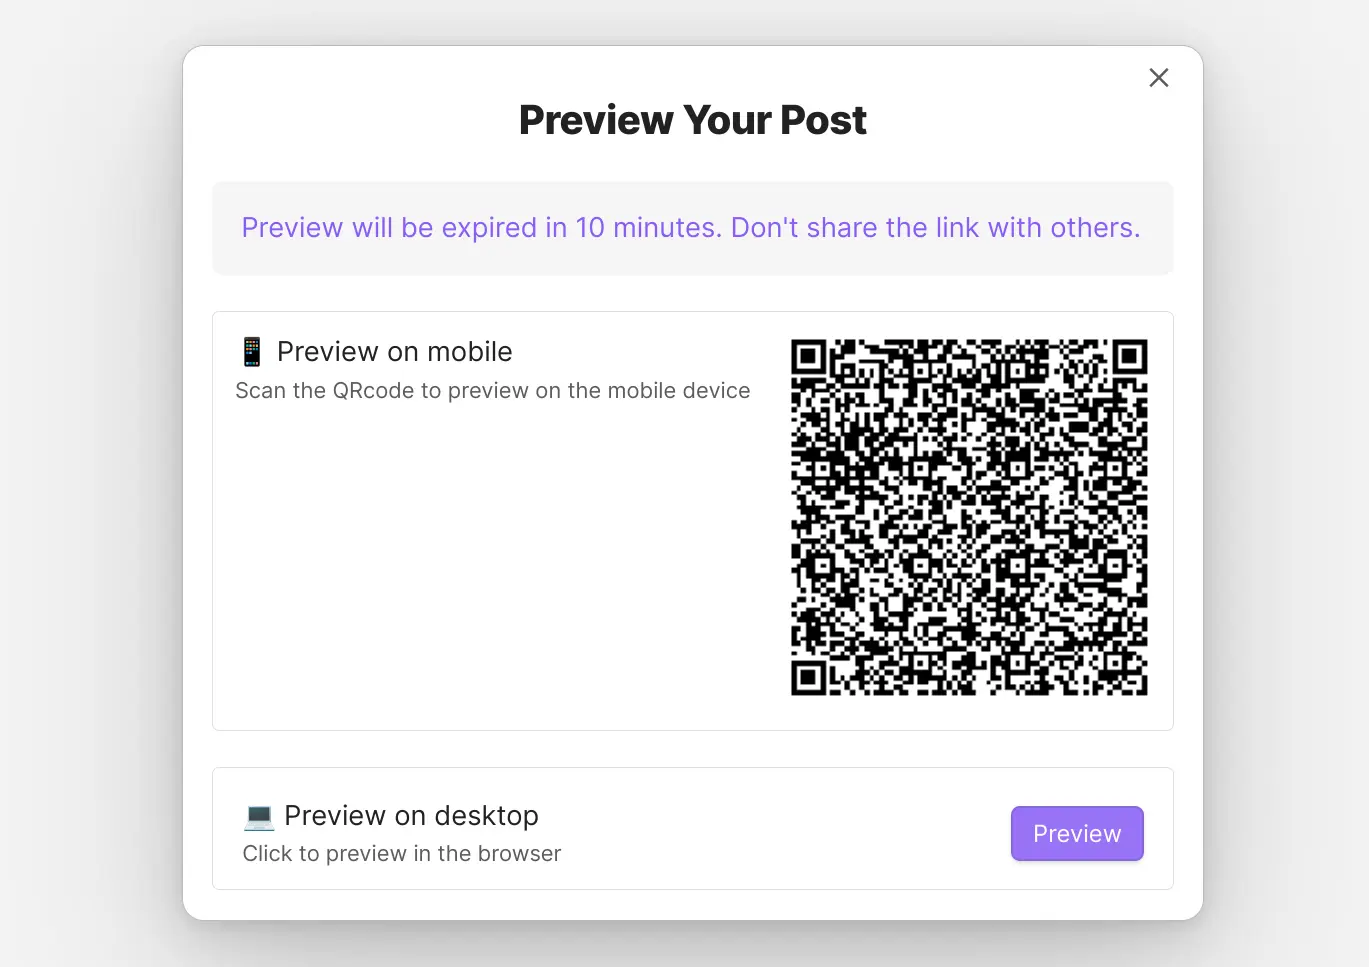
- Wait a moment, and Quaily popup a preview window, in which you can see the a QRCode and a preview button.
- By scanning the QRCode with your phone, you can preview the post on your phone.
- By clicking the preview button, you can preview the post in your browser.

Set default channel
Quaily's Obsidian plugin allows you to set a default channel for your posts, just in case you are using Obsidian to manage multiple Quaily channels.
- Use command "Quaily: Set Default Channel", then press Enter.
- Choose a channel from the list.
Inserting Images
If the images in your post come from your local vault of Obsidian, Quaily's Obsidian plugin can read them and automatically upload them to Quaily when saving or publishing posts. You can use both Obsidian's internal link syntax and general Markdown image syntax to insert images into your posts.
TIP
Once the images are uploaded to Quaily, Quaily will automatically convert the image into WebP format and replace the image links in your post with the URLs of the uploaded images.
Internal link syntax
It could be either absolute path or image aliasing in the sentence.
Here's an example:
![[image-1.png]]

![[images/image-2.png]]
The code above will insert the images image-1.png and image-2.png into the post. In this case, image-1.png is the only file with this name in the post, image-2.png is the a file under the images folder. You can also paste an image directly from the clipboard and Quaily will handle it automatically.
Markdown image syntax
Please use absolute path for inserting image in this way. Here's an example:
Suppose your Obsidian directory structure is as follows:
- [essay]
  - [images]
    - image-1.png
    - image-2.png
  - [posts]
    - test
Here, "essay," "images," and "posts" are folders, "image-1.png" and "image-2.png" are image files, and "test" is an post file.
If you want to insert the image "image-1.png" into "test," you need to use the following syntax:
Note that "essay/images/image-1.png" is an absolute path (starting from the top-level folder), not a relative path. If you use a relative path, Quaily's Obsidian plugin will not be able to locate the image file.
That's the usage of Quaily's Obsidian plugin. If you have any questions, please feel free to raise them in the bug tracker.